

Flower Seed Identification Pictures: Seed Heads, Shapes, and Common Matches
Compare seed heads, loose seeds, and plant context with photo clues and a simple workflow to narrow likely matches in flower seed identification pictures.
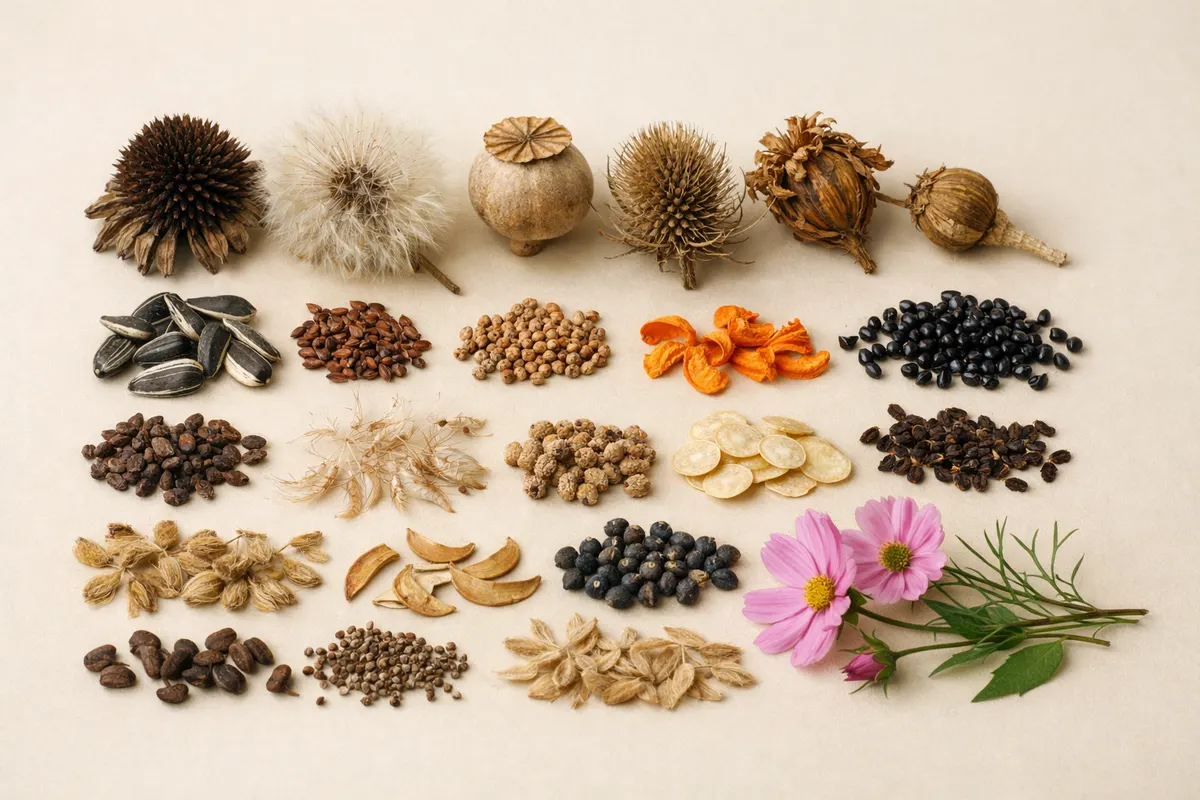
Quick answer for flower seed identification pictures
The quickest useful result from flower seed identification pictures comes from three dependable clues: seed head architecture (how seeds sit on or in the plant), seed shape and surface texture (wings, ridges, pappus, hooks), and plant context (remaining petals, leaves, or stem habit). Those elements survive most smartphone photos and often cut the candidate list to a few likely species.
Expect limits: color alone and a single close-up rarely prove identity. A photo that includes the seed head, several loose seeds on a plain background with a size reference, and a short plant-context shot (flower or leaf) gives the strongest signal for comparison. With those three images you can usually separate wind-dispersed fluff (milkweed, poppy pappus) from pods and burrs (borage, beggar-ticks) and from large, flattened seeds (cosmos, zinnia).
If you want a quick next step, take three photos before you try to identify: a wide shot of the seed head, a close-up of several loose seeds on a contrasting background with a ruler or coin for scale, and a picture of any leftover flower, seed pod, or leaf. Those photos let you use a practical checklist to narrow matches and decide whether to test a small germination sample or ask a local expert.
- Three photos give the best early signal: seed head, loose seeds with scale, and plant context.
- Prioritize shape, attachment, and texture over single-color cues.
- Use comparison to narrow to a few likely matches, then verify with a small germination test or local check.
Strongest visual clues
When evaluating flower seed identification pictures, treat the following visual clues as high-value evidence because they usually survive lighting and angle issues and are repeatable from phone photos.
Seed head architecture: note whether seeds are in a central disk, along a spike, inside a pod, or attached to a pappus (fluff). A sunflower’s many disk-arranged seeds contrast with milkweed’s silky pappus and a pea-like pod. The overall arrangement often rules out broad families at a glance.
Seed shape and profile: measure or estimate length and width and look for distinguishing shapes—flattened and winged, kidney-shaped, ovate, spherical, or needle-like. Small winged edges (as on some campions or brassicas) or a distinct beak (as in certain poppies) are robust clues.
Surface texture and margins: check for smooth versus sculpted surfaces, ridges, hairs, or a glossy sheen. Winged margins, tiny hooks, or a netted pattern are visible in most macro phone shots and are very diagnostic for many genera.
Attachment point and calyx/pod remnants: look for how the seed separated from the plant—a clear stalk remnant, a cap, or a split pod. Photos showing where the seed sat on the plant help distinguish pods (pealike capsules) from achenes (single-seed units like dandelion or chrysanthemum).
Scale and count: include a ruler, coin, or known object to record size and photograph a group of seeds to show typical variation. Seed size often separates common garden species: poppy seeds are 1–2 mm, cosmos and zinnia seeds are several millimeters and elongated, while milkweed seeds are flatter with a tuft of silky hairs.
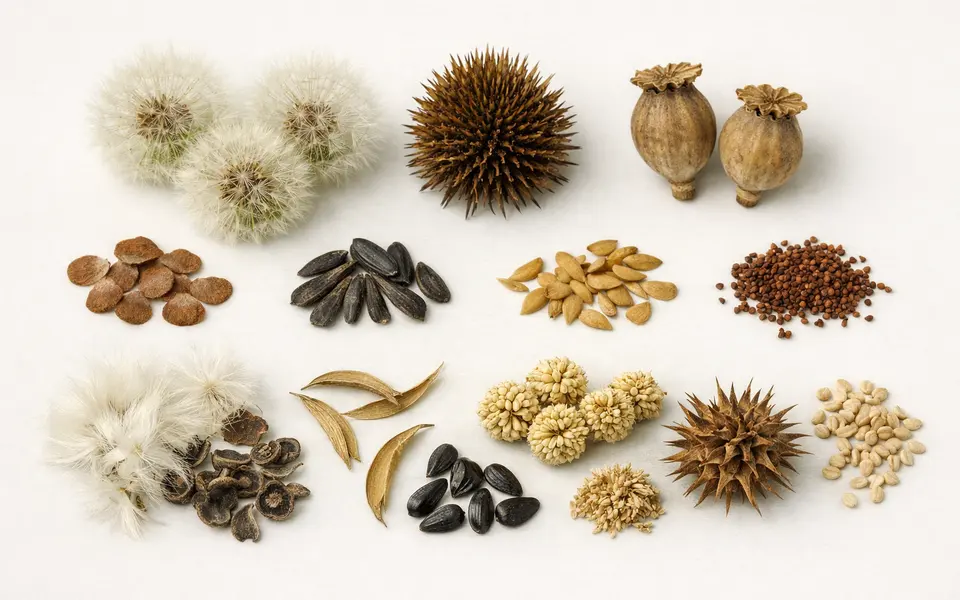
- Seed head architecture — disk, pod, spike, pappus; often separates families.
- Shape/profile — flattened, winged, kidney-shaped, spiny; use length and width.
- Surface texture — smooth, ridged, netted, hairy, hooked.
- Attachment evidence — stalk remnants, calyx, or pod split tells how the seed detached.
- Scale and group photos — size reference plus multiple seeds shows variation.
Weak signals
Some visible features are tempting to use but tend to mislead in flower seed identification pictures. Treat these as supporting clues only, not proof.
Color is often unreliable. Lighting, camera white balance, and age-related darkening can make the same seed look very different. While color can support a match (for example, the deep black of some poppy seeds), don’t rely on it alone—pair it with texture and shape.
Single-angle photos and decorative background glare are common traps. A seed photographed only from one side can hide a wing, beak, or tuft. Similarly, shiny surfaces photographed in harsh sunlight may look like different textures. Multiple angles on a neutral background mitigate these problems.
Small damage and partial seeds are weak signals. Broken, chewed, or shrunken seeds miss key features and can look like other species. Also avoid drawing conclusions from a single specimen—natural variation often spans what you see in one seed.
- Color alone is a weak signal—use it only with shape and texture.
- One-angle photos hide diagnostic features; take top and side views.
- Shiny glare and patterned backgrounds distort perceived texture and edges.
- Damaged or atypical seeds can lead to false matches.
Comparison workflow
A short, repeatable workflow moves you from raw photos to a short list of likely matches without overstating certainty. Follow these practical steps each time you use flower seed identification pictures.
Step 1 — Photograph consistently: take a wide shot that shows the whole seed head plus at least two close-ups: several loose seeds on a flat, neutral background with a scale, and a close-up showing the seed’s edge and attachment point. Add a plant-context shot that includes any remaining petals, leaf shape, or stem habit.
Step 2 — Record context: note location (garden bed, roadside, meadow), collection date, and whether seeds were dry or moist. Habitat and season narrow options—wetland plants, for instance, often have different seed types than dry-field annuals.
Step 3 — Triage by dispersal type: use the seed head and seed structure to sort candidates into wind-dispersed (pappus, papery wings), animal-dispersed (hooks, burrs), gravity/pod-dispersed (peas, pods), or large-flattened garden seeds. This quickly eliminates many families.
Step 4 — Match on at least two strong clues: choose candidate species that match the head architecture plus one other strong trait (shape, texture, or attachment). Use comparison photos from reliable sources or a seed chart to see how your photos line up with typical examples.
Step 5 — Verify carefully: when you have a short candidate list, test with a small germination trial, consult a local extension agent or experienced gardener, or compare to museum-grade images in trusted references. Avoid planting large numbers until you confirm identity and local suitability.
- Photo set: seed head, loose seeds with scale, side/top views of seeds, and plant context.
- Record date, location, and substrate to narrow habitat-based candidates.
- Sort by dispersal mechanism to reduce candidate families quickly.
- Require at least two matching strong clues (e. g. , pod type + seed wing) before calling a likely match.
- Verify with a germination test or local expert before large-scale planting.
App workflow
After you gather the suggested photos and notes, use the app as a focused comparison tool rather than a final authority. Seedio (Seed Identifier - Seedio) works well as a first-pass filter to generate candidate matches from your seed head, loose seeds, and plant-context images.
Open the app on your phone and run matching using the three-photo set: whole head, loose seeds with scale, and a plant-context shot. Review candidate matches for the same two strong clues you identified earlier—head architecture and seed profile—and set aside any results that match on color alone or on a single vague trait.
Use the app’s results to prioritize next steps: pick a top candidate to test with a small germination tray, or collect clear photos to send to a local extension, seed bank, or experienced gardener for confirmation. Seedio is useful for narrowing possibilities quickly, but do not treat the app match as definitive identification—always verify before mass planting or claiming species.
- Start with the three-photo set to feed the app: seed head, loose seeds (with scale), and plant context.
- Treat app matches as hypotheses—use the strongest common clues to accept or reject candidates.
- Use app results to choose a small germination test or to prepare clear comparison photos for a local expert.
- For more on photographing seed heads and how they look in photos, see the guide "Flower Seed Identification by Photo: How to Identify Flower Seeds and Seed Heads" (https://seedidentification. app/blog/flower-seed-identification-by-photo).
Related guides
Try Seedio with a proper photo set
After photographing the seed head, several loose seeds on a plain background with a size reference, and a plant-context shot, open Seedio on your phone to generate candidate matches. Use the app as a first-pass filter, then verify matches with a germination test or local expert before large-scale planting. Visit Seed Identifier - Seedio to get started.
Take the next step →Frequently asked questions
Can I identify a flower seed from a single close-up photo?
A single close-up can show texture and color but is rarely enough on its own. Without seed head context, scale, and at least one side view you may miss wings, tufts, or attachment features. Use a small photo set—head, loose seeds with scale, and plant context—for a reliable shortlist.
What size reference should I include in seed photos?
Include a ruler, a standard coin, or a common object with known dimensions in the same plane as the seeds. That lets you estimate millimeters. If you don’t have tools, lay seeds next to a thumbnail and note the approximate length; size differences of a few millimeters often separate common garden species.
How many seeds should I photograph at once?
Photograph a small group (6–12) of representative seeds so viewers can see typical variation. One seed can be atypical—group shots show size range and shape consistency, both helpful for matching to species descriptions or reference images.
How can I verify an identification after using photos and an app?
Use a three-part verification: compare your photos to trusted reference images, run a small germination test to confirm growth habit and seedling leaf shape, and, if needed, consult a local extension service or botanical expert for final confirmation. Avoid large-scale planting until you have a verified ID.