

Flower Seed Identification by Photo: How to Identify Flower Seeds and Seed Heads
Practical steps and photo tips for flower seed identification by photo: what visual clues matter, common lookalikes, and safe next steps after a match.
Quick answer for flower seed identification by photo
Flower seed identification by photo is possible in many cases when the image captures key visual clues: seed shape, surface texture, seed head structure, and plant context (flowers, leaves, or stems nearby). A good photo can often narrow candidates to a small group—enough to decide whether to save, label, compare, or plant a few to test—but a single picture rarely proves species beyond doubt.
Use photos to rule in or out common categories (e. g. , winged seeds, small round achenes, fluffy dandelion-like seeds, or pods that split). When the seed head structure is visible—how seeds attach, whether they’re in a cluster or single row, or if they have pappi (fluffy hairs)—you gain the strongest clues for an identification.
If you want a confident next step, pair a clear seed photo with at least one image showing the plant context (leaf shape or the last flower), and a scale reference like a ruler or a coin. These combined photos let you go from a guess to a useful action: save seeds, test germination, or seek local verification.
Photo checklist
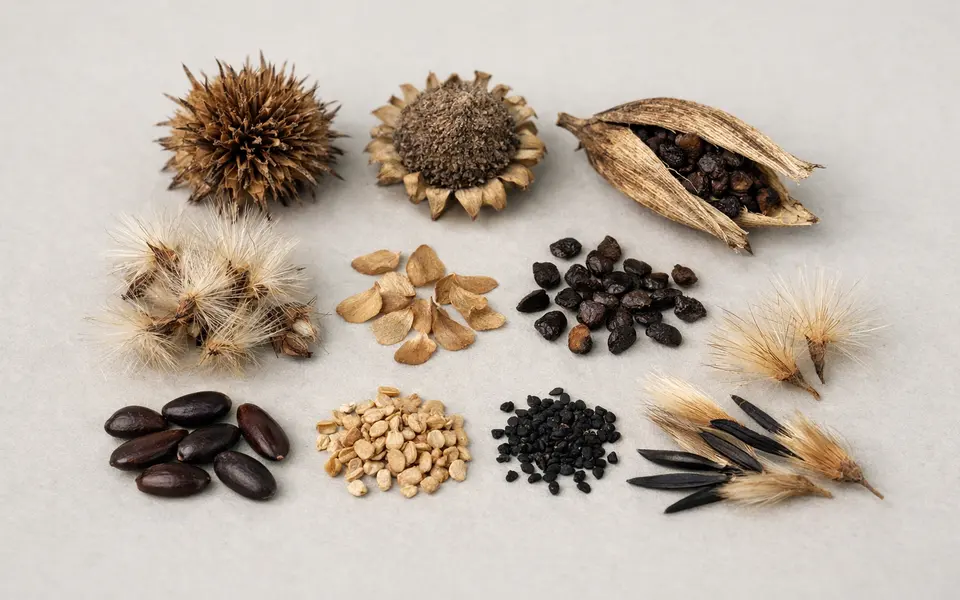
Capture three types of shots: a close-up of the loose seeds or single seed, a detailed photo of the seed head or pod in place, and a wider shot showing the plant context (leaves, stem, and any remaining flowers). Each image answers a different identification question—texture and markings, attachment and arrangement, and plant habit respectively.
Include a size reference in at least one image. A coin, a ruler, or a fingertip held beside the seed or seed head removes most size guesswork that misleads identifications. If seeds are scattered on a surface, group a few next to the reference rather than photographing a single seed alone.
Aim for steady focus, natural light, and minimal shadow. Use a phone’s macro mode or the camera’s close-focus setting for small seeds; backlight delicate seed hairs to show pappi or wing outlines; avoid heavy digital zoom which softens edges and hides fine surface details.
- Close-up (macro) of an individual seed showing texture, color, and any ridges or wings
- Seed head or pod in place to show attachment pattern (clustered, columnar, single-seeded cells)
- Context shot of the plant: leaf shape, stem texture, last flower or spent bloom
- Scale reference (coin, ruler, or fingertip) included in at least one photo
- Multiple angles: top view, side profile, and a rotated view to show asymmetry
- Good lighting: diffuse daylight is best; avoid harsh midday sun or deep shadow
Visual clues
Prioritize stable structural clues over color alone. Seed shape (oval, kidney-shaped, winged, flat, round), size (millimeters vs. centimeters), and attachment pattern (does each seed sit in a cell, on a disk, or along a seam? ) are the most diagnostic features you can see in a phone photo.
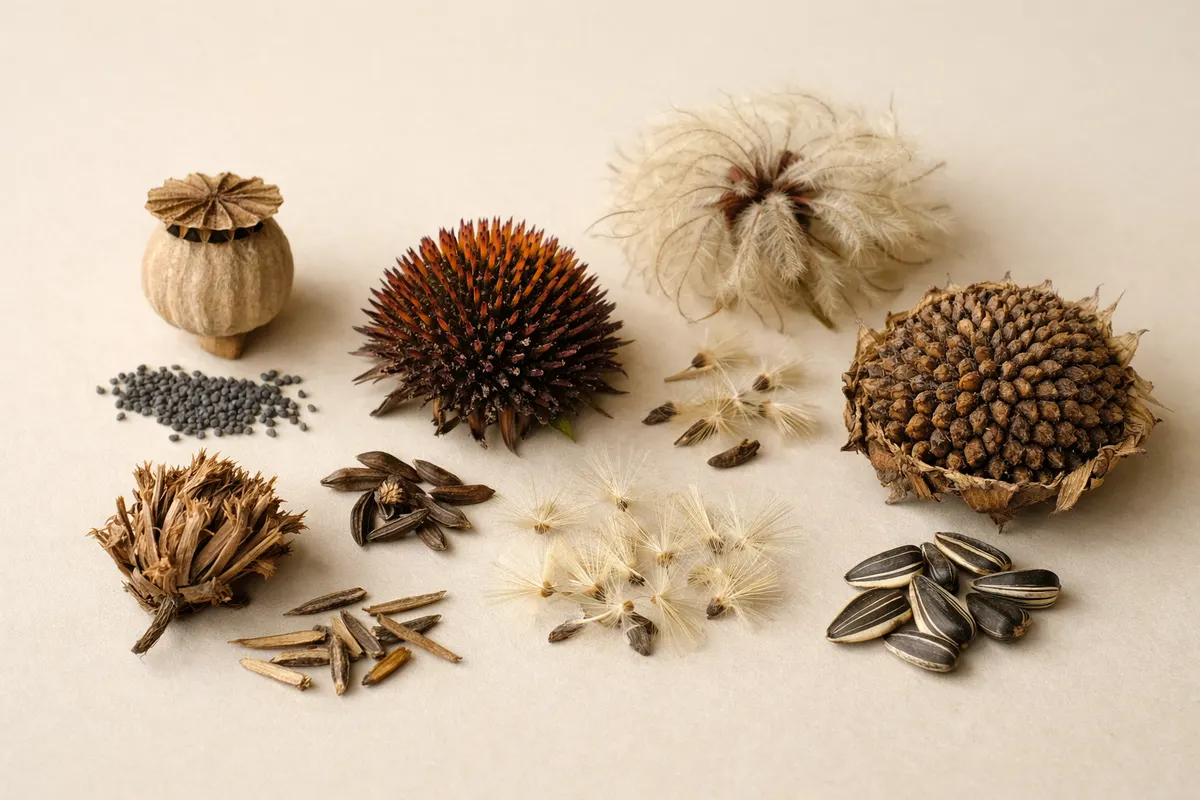
Surface texture and markings are next: check for ridges, pitting, hairs, floss, wings, or arils. For example, poppy seeds are tiny and pitted; coneflower (Echinacea) or sunflower-style seed heads show seeds tightly packed in spirals; milkweed seeds have silky hairs that aid wind dispersal.
Seed head architecture tells a story. Umbel-like clusters (dill, Queen Anne’s lace), capsule pods that split open (larkspur, delphinium), siliques or pods that open along seams (mustards), and composite heads that hold many individual achenes (asters, daisies) point toward very different plant families even when individual seeds look similar.
- Shape: winged, round, flattened, kidney-shaped, elongate
- Attachment: solitary on stalk, packed in a disk, in rows inside a pod or capsule
- Surface: smooth, pitted, ridged, hairy, winged, or with a fleshy aril
- Dispersal structures: pappi (fluff), wings, hooks, or sticky coatings
- Seed head form: spiky, columnar, clustered umbel, capitulum (composite head), or dehiscent capsule
Examples by type
Small pitted seeds: Poppy-family seeds (Papaveraceae) are tiny, dark, and pitted. In photos they often look like coarse sand when viewed en masse. When you see a round, dimpled surface at millimeter scale, consider poppies or related plants.
Wind-dispersed with hairs or wings: Milkweed seeds have a flat brown seed attached to a tuft of silky hairs; thistles and dandelions show pappi—fluffy parachutes—and are unmistakable in side-lighting that reveals the hairs. Maple keys and certain tropical seeds show flat wings that are visible in profile shots.
Composite flower achenes (asters/daisies): Many garden flowers leave behind a composite head where each seed is an achene with or without a pappus. Sunflower seeds are large, striped, and seated in a patterned disk; smaller aster achenes are elongated and may have tufted hairs at one end.
- Poppy-like tiny pitted seeds: look like coarse sand in close-up and are often dark gray or brown
- Milkweed/thistle: flat seeds with silky hairs—backlighting highlights the fluff
- Sunflower/coneflower: larger, striped or plump achenes in a visible patterned disk
- Winged seeds (samaras): flat wings visible in side profile—maple-style or single-winged
- Pods and capsules: seeds seen inside split pods (mustard family, legumes) versus seeds remaining in a central column (larkspur, delphinium)
Compare likely matches
When two seeds look similar, stack clues rather than choosing the most familiar image. For example, small brown oval seeds might be either aster achenes or small legume seeds. Check attachment: achenes sit on a disk or in a composite head; legume seeds are inside pods and will show seam lines or pod remnants nearby.
Use plant context to separate lookalikes. Leaf shape, stem hairiness, flower remnants, or the season and location where you found the seed narrow down options quickly. A seed found near a spent sunflower head is far more likely to be a sunflower achene than an unrelated tiny brown seed dropped by a bird.
Ask what extra photo would separate candidates. If two matches remain, a photo of the seed head's interior (after gently opening it) or a close look at the seed’s attachment point will usually break the tie. In many cases a simple germination test (plant a few seeds in controlled conditions) provides the practical confirmation gardeners need.
- Stack clues: shape + attachment + plant context before selecting a match
- Look for pod seams, disk packing, or residual floral parts to separate similar seeds
- Take an extra shot of the seed’s point of attachment to confirm whether it’s an achene or free seed
- When visual clues leave doubts, a germination trial clarifies identity without risk
Common mistakes
Relying on color alone leads to errors. Many seeds change color with drying and age; two unrelated species can share a brown or tan hue. Always corroborate color with shape, texture, and context before drawing conclusions.
Assuming seeds belong to the nearest flowering plant is a frequent trap. Wind, birds, and human activity move seeds short and long distances. Before assigning identity based on proximity, check the attachment pattern and seed head architecture to confirm a match.
Over-interpreting a single photo reduces reliability. Blurry edges, poor scale, or a single perspective hides diagnostic features. If the photo omits a scale reference or the seed’s point of attachment, label the image as provisional and gather one or two more views.
- Mistake: using color as the primary cue—color shifts with age and exposure
- Mistake: assuming proximity equals origin—seeds often travel from nearby sources
- Mistake: low-quality close-ups hide texture and ridges—use macro focus
- Mistake: ignoring the seed head’s structure—how seeds attach is often decisive
App workflow
After photographing the seed head, loose seeds, and plant context, use the app as a structured first pass: upload or scan your images in the app, review the visual matches it suggests, and check the app’s suggested clues against the ones you observed manually. Treat the suggestions as candidate matches to validate, not final determinations.
Use the app’s comparison features to display side-by-side images of suggested matches and your photos, focusing on the seed’s shape, surface texture, and attachment. Tag images in the app with site, date, and any notes about where you found the seeds—this metadata often helps later, especially if you return to check germination or seek local expert help.
If the app suggests multiple possible IDs, use it to list the highest-confidence candidates and then follow the comparison checklist: ask which candidate best matches seed shape, which matches attachment, and which fits plant context. If you plan to save or plant seeds, label packets in the app with the candidate name and a confidence level so you can track results over time.
- Photograph: seed close-up, seed head in place, and plant context before opening the app
- Scan or add photos to the app and review side-by-side candidate matches
- Tag images with date, location, and notes about the plant or where seeds were found
- Label saved seed packets in the app with candidate names and confidence level
Next steps by confidence level
High confidence (clear match): If the photos show diagnostic features—distinctive attachment, unique wing or pappus, or a large patterned disk that matches a known species—save and label the seeds, note the collection date, and run a small germination test if you plan to plant. Retain a couple of seeds or a seed head as a voucher in case you need to verify later.
Partial confidence (good candidate set): When your images narrow candidates to a small group but one detail is missing, collect a few seeds and perform two checks: take an extra macro image showing attachment or the seed’s reverse side, and plant 10–20 seeds in controlled conditions to observe seedling traits. Seedlings often reveal leaf shapes or cotyledon patterns that distinguish close species.
Low confidence (uncertain): If photos lack scale or the seed head structure is obscured, avoid distributing seeds widely and do not assume edibility or safety. Keep seeds contained, gather the missing photos, and seek local verification from a garden center, extension service, or an experienced local grower before large-scale planting or sharing.
- High confidence: label, save a voucher, and run a small germination test
- Partial confidence: take extra photos of attachment, then grow a test batch to confirm
- Low confidence: avoid planting widely, get more photos or local expert verification
Limitations
A photo alone frequently cannot prove species-level identity. Many plant groups have visually similar seeds, and features like scent, microscopic surface patterns, chromosome counts, or genetic markers are beyond camera reach. Treat photo-based identifications as well-founded hypotheses rather than definitive answers.
Do not rely on a photo to assess safety, edibility, or legal status. Never assume a seed is safe to eat, feed to animals, or distribute based solely on a photographic match. If seeds might be regulated (noxious weeds or protected species), contact local authorities or extension services before moving or planting them.
When professional confirmation is required—e. g. , for seed sale, conservation, or legal concerns—collect physical vouchers following local sampling guidelines and consult a seed lab or botanist. For general gardening use, photographic identification plus a germination trial is often sufficient, but keep records and samples if you anticipate needing verification.
- Photos are hypothesis-generating, not proof of species
- Do not use a photo alone to determine edibility, toxicity, or legal status
- Seek professional confirmation for sale, conservation, or regulated seeds
Related guides
Try Seedio after photographing seeds and seed heads
After you photograph the seed close-up, the seed head in place, and a wider plant-context shot, open Seed Identifier - Seedio on your device to compare candidates, tag images, and save labeled seed packets. Use the app as a structured first pass—then confirm with a germination test or local expert when needed.
Take the next step →Frequently asked questions
What is the single most useful photo for identifying flower seeds?
A sharp close-up that shows the seed’s shape, surface texture, and a scale reference is the most useful single image. If possible, pair that with a photo of the seed head still attached to the plant—the attachment point often narrows matches dramatically.
Can I identify seeds from a photo if the plant is gone?
Sometimes. Loose seeds with distinctive wings, hairs, or surface patterns can be identified without the plant, but many seeds require plant context (leaf or stem features) to separate lookalikes. If the plant is gone, take multiple seed-only angles and include a size reference to improve chances.
How many seeds should I plant to test an identification?
Plant a small, controlled test batch: 10–20 seeds gives a reasonable sample for germination and early seedling traits. Keep conditions consistent and label each tray with the candidate ID and date. Seedling leaf shape and growth habit are often the easiest way to confirm a photo-based hypothesis.
When should I seek expert or lab confirmation for a seed ID?
Seek expert confirmation if you plan to sell seeds, restore habitats, move soil or seed between jurisdictions, or if a seed might be a regulated invasive or protected species. For those cases, collect physical vouchers, retain seed heads, and contact local extension services, botanical gardens, or specialized seed labs.